I love scuba diving. And every diver wants good underwater memories. Your first dive experience can be a lifelong passion so remember this. Let’s look at how to successfully scuba dive for beginners – 11 essential tips to get you started so you know what to expect.
How To Scuba Dive For Beginners?
It’s not just about taking the plunge! It’s about your fitness, safety, breathing technique, diving with a buddy, scuba diving courses, choosing where you want to dive and planning your scuba gear smart shopping. These tips will help eliminate your stress and make you want more underwater adventures.
The 11 Essential Tips To How To Scuba Dive For Beginners
1. Assessing Your Fitness for Scuba Diving
When scuba diving, understanding the impact of water pressure on your body is crucial. As you descend, the water pressure increases, decreasing the air volume in your body. Conversely, as you ascend, the air in your lungs expands.
What does this mean?
You don’t need to be in peak physical condition, but reasonable fitness is necessary. It’s important to be aware that your body will have to adapt to stress, cold water, and a level of exercise depending on the dive condition. Having a strong heart and a good circulatory system will help you.
Fitness Considerations For Scuba Diving:
Ensure you don’t have any of the following health conditions:
- Cardiovascular: Severe heart disease or recent heart attack, uncontrolled high blood pressure, arrhythmias
- Respiratory: Severe asthma or chronic obstructive pulmonary disease (COPD), related infections
- Neurological: Epilepsy or history of seizures, severe migraines, recent head injury or concussion
- Diabetes: Severe anxiety, panic disorders, or claustrophobia
- Ear, nose, and throat: Severe sinus problems or chronic ear infections
- Mental health: Severe anxiety, panic disorders, or claustrophobia
Scuba diving under the influence of alcohol can be dangerous. Not only can it impair your physical and cognitive ability but this can cause dehydration risking decompression sickness.
NOTE: Legitimate dive shops will ask you to complete their Divers Medical Questionnaire. If you’re on medications, consult your family doctor for written approval to scuba dive. Keep your doctor’s documentation with you.
2. Exploring Your Doubts – Unsure About Scuba Diving?
Some of the doubts people have before they decide to get into scuba diving are:
- Trusting in themselves in the underwater environment*
- Handling their scuba dive equipment – scuba diving course
- Being able to breathe through a scuba dive regulator and not through their nose – scuba diving course
Scuba diving can be expensive, especially if your plans include flights and accommodations to the islands of paradise.
*If you’re not 100% used to being in the water, you might quickly find yourself in trouble. The best way to get comfortable in water that’s over your head is to do the following:
- Spend time in your local pool: Get comfortable. If you’re not a good swimmer, take swimming lessons to develop your skills.
- Practice putting your head underwater: Becoming comfortable with this is crucial for scuba diving.
- Try introductory dives: Many scuba dive shops, like PADI, offer Discover Scuba Diving courses (3-4 hours). This non-certification course is an excellent way to help you decide if scuba diving suits you.
Additionally, test different waters to determine your suitability. You might prefer ocean diving, cold water diving, or something else.
Once you’re convinced you want to do this…..
3. Selecting Your First Scuba Dive Location

Before taking the plunge into the open water, like I said earlier, your first dive experience will determine if you get hooked on scuba diving. One thing for sure is that you don’t want to end up in unfavourable water conditions like:
- Choppy water
- Poor visibility
- Strong currents
- Cold water
Experiencing any of these conditions can lead to stress, anxiety, or seasickness, which might make you not want to scuba dive again.
What’s the solution? The best thing to do is research your potential dive locations thoroughly. Focus on the following factors:
- Suitable location: Choose a location that matches your physical skill and experience. For instance, consider places like Thailand, known for its beginner-friendly dive sites.
- Dive conditions: Do your research on the water conditions. Are there any currents? What’s the visibility like? How deep will you be diving?
- Water temperature: How thick will your wetsuit be? Warm water gives beginner divers a comfortable experience.
- And most importantly, feeling safe: Choose a reputable dive shop and training facility with experienced scuba dive instructors. Read their reviews.
By doing all these, you’re setting yourself up for a memorable and enjoyable first scuba dive experience!
4. It’s Time To Get Certified And Have Some Fun
Your first experience is the most important dive!
The safest way to enjoy your dives and to gain confidence is to book with a reputable dive school that earns you your recreational scuba diving certification(s) (PADI). Dive shops will not give you a tank without proof of your dive certification.
You can do this:
- Through your local dive shop
- During your vacation
- Through PADI eLearning – PADI Open Water Diver Certification (Beginners) – Dive Theory
The dive theory eLearning (part 1) can be done at home or during your lunch hour at work. On average this might take 10 – 15 hours and you have 1 year to complete this. I recommend doing this because part 2 of this Open Water Diver Certification can be completed in warmer water during your Caribbean vacation.
You’ll learn the following in your Dive Theory:
- Effects of pressure changes on your body and how to manage it
- Diving terminology
You can communicate with your online instructor to discuss the lessons and ask questions.
5. Never Scuba Dive Alone!
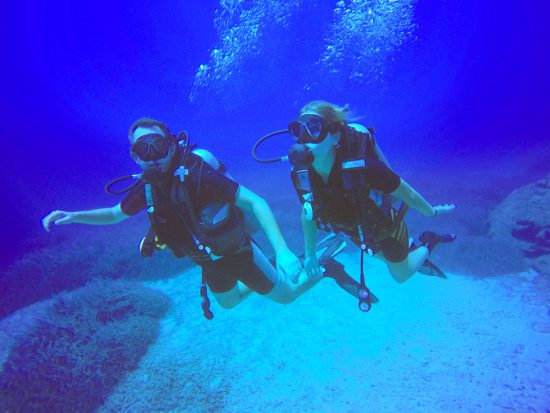
There are no scuba police when you go scuba diving. I’ve done over 750 dives (compared to others) and even though I’m a solo traveller, I will not dive alone. Diving with a buddy increases your safety and adds to the fun when you can share experiences. Imagine being alone in open water going through a dive emergency such as:
- Running out of air in your tank
- Getting stuck in an entanglement situation
- Equipment malfunction
- Becoming lost
If you don’t have a dive buddy, don’t sweat it. You can always stay close to your underwater tour guide or the dive shop will match you with another diver. Who knows maybe you’ll have a lifelong bond 😁!
6. Dive Deeper, Learn More
Embrace your scuba education and experience!
Do you want to be a better diver and feel ultimately safer?
Unless you’re not retired, chances are you’ll go diving at least once a year and that’s fine. However, when you finally get back on a dive boat and gearing up, a feeling of doubt might creep inside your heart… ‘I’m afraid’, ‘It’s been a while…’.
Here’s what I suggest. Anytime, you’re near a body of water where you live, take more PADI scuba diving courses in the following order:
- Advanced Open Water Diver
- Rescue Diver
- Master Scuba Diver
- Dive Master
- Open Water Scuba Instructor
- Plenty of Specialty Courses – Cave Diving, Night Diving, Cold Water Diving, etc.
The Rescue Course is in my opinion, the best if you want to hone your diving skills and get plenty of confidence! And it’s fun!
7. Breathe Easy – Mastering Your Scuba Breathing
Nose breathing is healthier than mouth breathing but when you’re scuba diving you’ll be breathing out of your mouth through a scuba dive regulator attached to your oxygen tank. It won’t feel natural but trust me you’ll get used to it.
Remember This Rule: Take slow deep breaths! This breathing technique will help you relax and conserve the air in your tank.
How do you breathe slower and more deeply with a scuba dive regulator in your mouth? Try this exercise at home:
How to Take Slow Deep Breaths:
- Lie down on your back
- Put one hand on your chest
- Then take a deep slow breath through your mouth
- Pause for a second (never hold your breath)
- Now slowly breathe out through your mouth
- Practice this until you have a calming rhythm going
8. Easing Ear Pressure For Comfortable Dives – Happy Ears Happy Dives
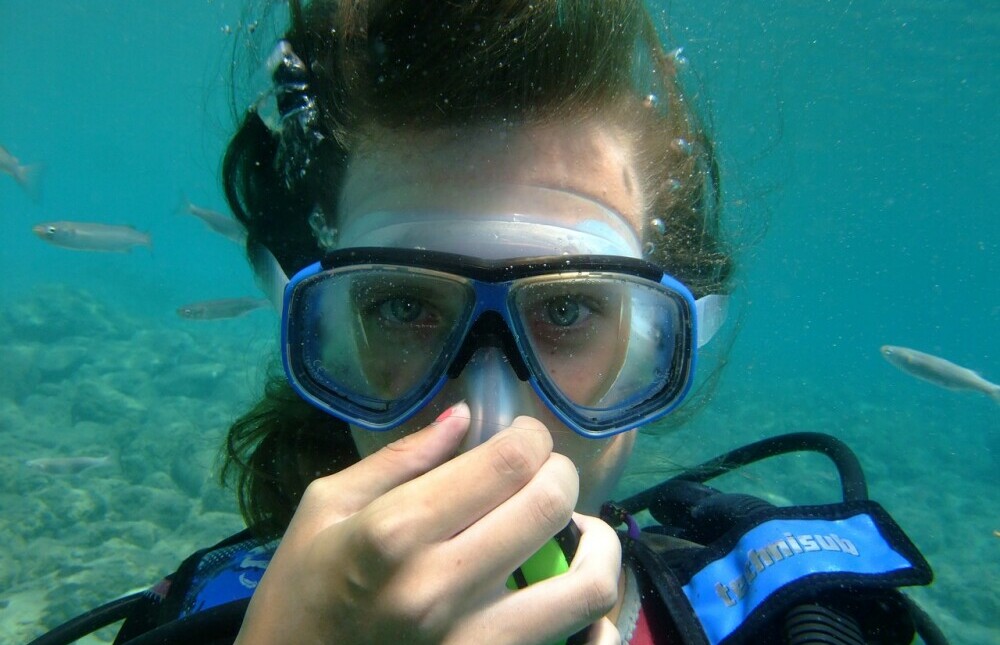
When you go scuba diving, you’ll experience pressure in your ears caused by the pressure difference between the middle ear and the surrounding water. The ear pain typically continues as you dive deeper. If you don’t address this, you could potentially end up with middle ear injuries.
All certified scuba divers know they have to equalize the pressure in their ears so they use methods to do this.
Here are some of my underwater ear-equalizing maneuvers (with your scuba dive mask on of course):
- Pinch your nose and GENTLY blow through it as you slowly descend every 2 feet or less. Stop where you are if the pressure doesn’t ease off.
- Ascend slowly a couple of feet, pinch your nose, and gently blow through it. Repeat.
- Pinch your nose, gently exhale, and swallow.
- Move your jaw from side to side or forward and backward.
- Rotate your head up and down.
- Always descend feet first.
You’ll know when the pressure in your ears stops because you’ll hear a squeaking or a popping sound.
If you’re still unsuccessful in removing the pressure in your ears signal your dive buddy you’re experiencing too much pain. It’s time to abort the dive and slowly ascend to the surface together.
** This is one of the reasons you don’t want to dive when you feel ‘stuffed up’, the mucous buildup can block your sinus cavity.
9. Underwater Communication – The Secret Language
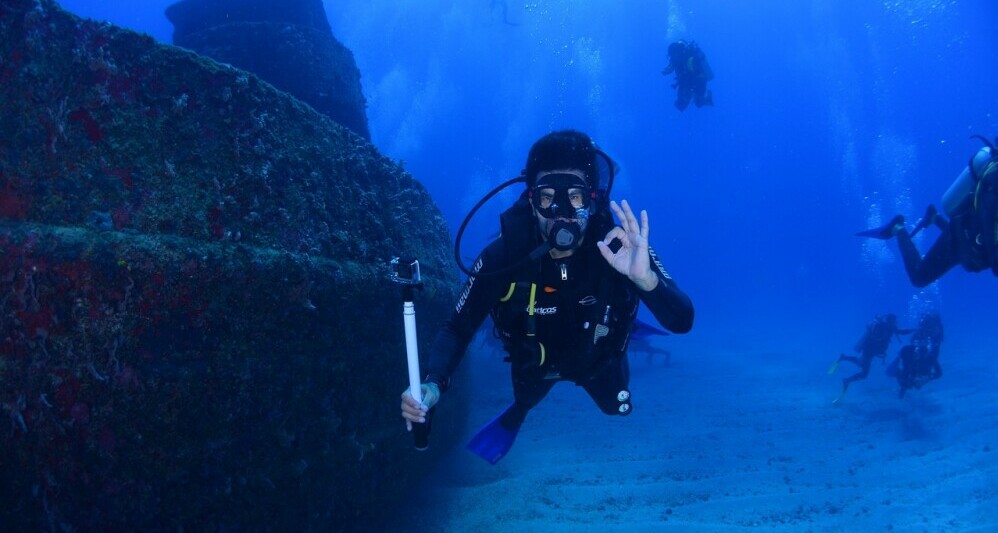
Navigating with scuba dive hand signals is done with shapes and gestures.
You’ll enjoy the silence of the underwater world and have fun exploring, but you’ll always use your hand signals. You can’t have a conversation like you would on land.
You’ll use hand signals (part II of your Open Water Diver Certification) with your buddy if:
- You need help.
- Are you ok? (As portrayed in the image above)
- You want to point out the nearby hazard.
- Which way should we go?
- Look at these …
- I’m low on air.
- etc.
10. Selecting Scuba Gear At Your Pace – Shopping Smart!
When should you purchase your gear? For sure, not right after you earn your Open Water Diver Certification. If you plan to purchase your scuba gear as a new diver, you want to ensure this investment is a long-term plan.
Scuba diving is an expensive sport and there are certain limitations. It isn’t like downhill skiing where you can spend the day skiing down mountain slopes. With diving, you might only do two dives for 30 – 40 minutes each, depending on how fast you consume the air in your tank.
Your basic scuba dive gear consists of:
- Scuba dive mask
- Scuba dive fins
- BCD (Buoyancy Control Device)
- Scuba dive regulator
- Wetsuit to protect and keep you warm
- Dive computer
If you were to purchase all of this, it could cost $900 to $5000.00 depending on the quality and brand.
Before purchasing your dive gear, here are some tips to think about.
- Take some time to get some dives under your belt.
- Try using the different rental kits. You’ll start to pick up on things you like, or things that annoy you, which can help make your choice.
- Not enough experience with different equipment. It may not be a good fit/need.
- Hauling the gear is a pain in the butt especially when you’re flying. It takes up space and weight in your suitcase.
- Added expense. Your regulator requires regular maintenance.
- Decide scuba diving is not what you thought. No time, you don’t like it as much.
Instead, purchase inexpensive gear like a scuba mask, fins and maybe a wetsuit.
11. Perfecting Your Arm Placement Underwater – From Awkward to Awesome!
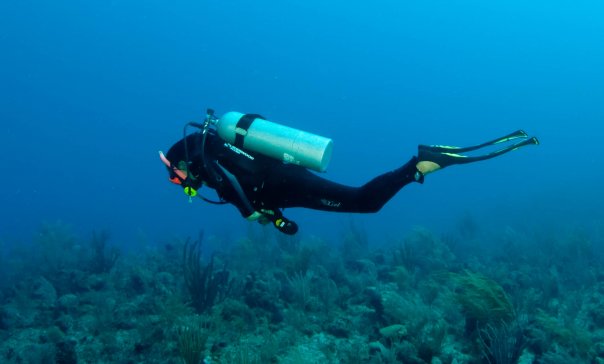
I’ve noticed many new divers flail their arms to propel forward. You don’t want to do this for several reasons:
- You’ll use more energy.
- You’ll run out of air more quickly.
- Your neutral buoyancy will be out of whack.
- You can damage coral.
You only need to use your fins and your leg muscles to get you moving forward.
So where should your arms be placed?
Here are my tips to help you determine the best method that works for you:
- Fold your arms and tuck them into your body: This is my favourite method. I can easily free them when I need to. Keeping your legs straight with a slight bend of your knees will help keep your body streamlined (taking up less space underwater).
- In front of you: Hold your arms in front of you and lace your fingers together.
- Behind your back: Tuck your arms underneath your tank.
- Grasp your BCD.
There is no right or wrong way. The important part is once you stop flailing your arms, your air consumption and neutral buoyancy become easier. This helps your breathing technique and gets you feeling confident!
Want to check out some of the perfect dive spots for beginner divers? Start creating your amazing dive memories with my top recommendations! Check this out here! (link)
Final Verdict – The Main Takeaways
Learning to scuba dive is not only an adrenaline rush, but the result will take you into another world of discovery. You only need to do it the right way! It’s about your fitness, safety, breathing technique, diving with a buddy, taking scuba diving courses, choosing where you want to dive, buoyancy, and planning your scuba gear smart shopping.
What Do You Think?
Let’s assume, you completed your Dive Theory. Where do you want to finish Part II of your recreational Open Water Diver Certification? This involves training with your dive instructors in shallow water, familiarity with your scuba gear (provided for you), and four open-water dives.
What’s on your bucket list for locations with a body of water? You can let me know in the comment box below. I’ll get back to you!
Thanks for reading!
Monica
